
Clothing store
Players walk into a clothing store on the map and press E. Everything they try on is free until they pay. The menu shows every garment of the server with its photo, its textures and its price.
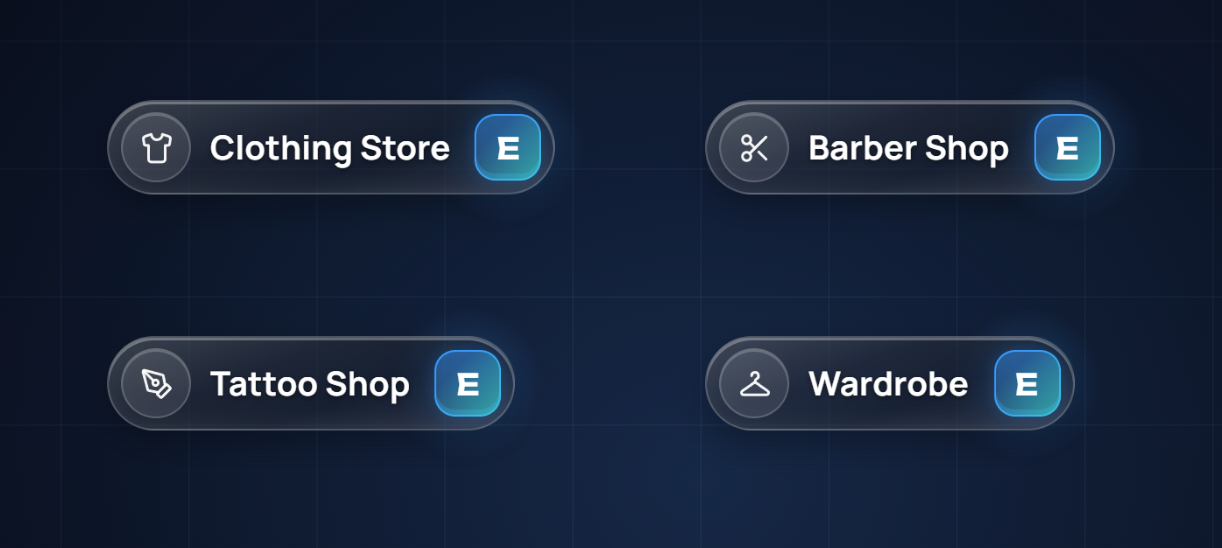
Opening a store
At a store, a floating sign with the store's name and the E key shows where to stand. When E can be pressed, the key lights up.
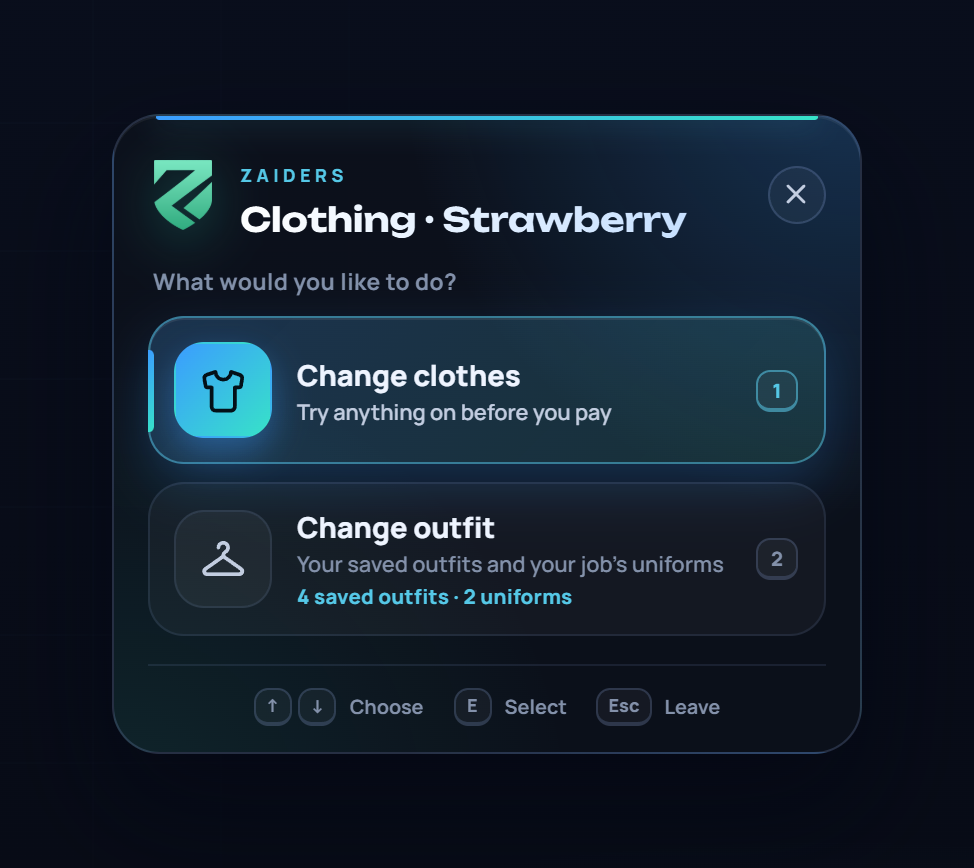
In a clothing store, E first asks what the player wants:
- Change clothes opens the store.
- Change outfit opens their wardrobe: saved outfits and their job's uniforms. It also shows how many they have.
The arrows or W/S choose, and E, a click or the option's number accepts. Esc leaves. If a store offers only one of the two, E goes straight to it. Each store's options are set in the panel. See Map shops & blips.
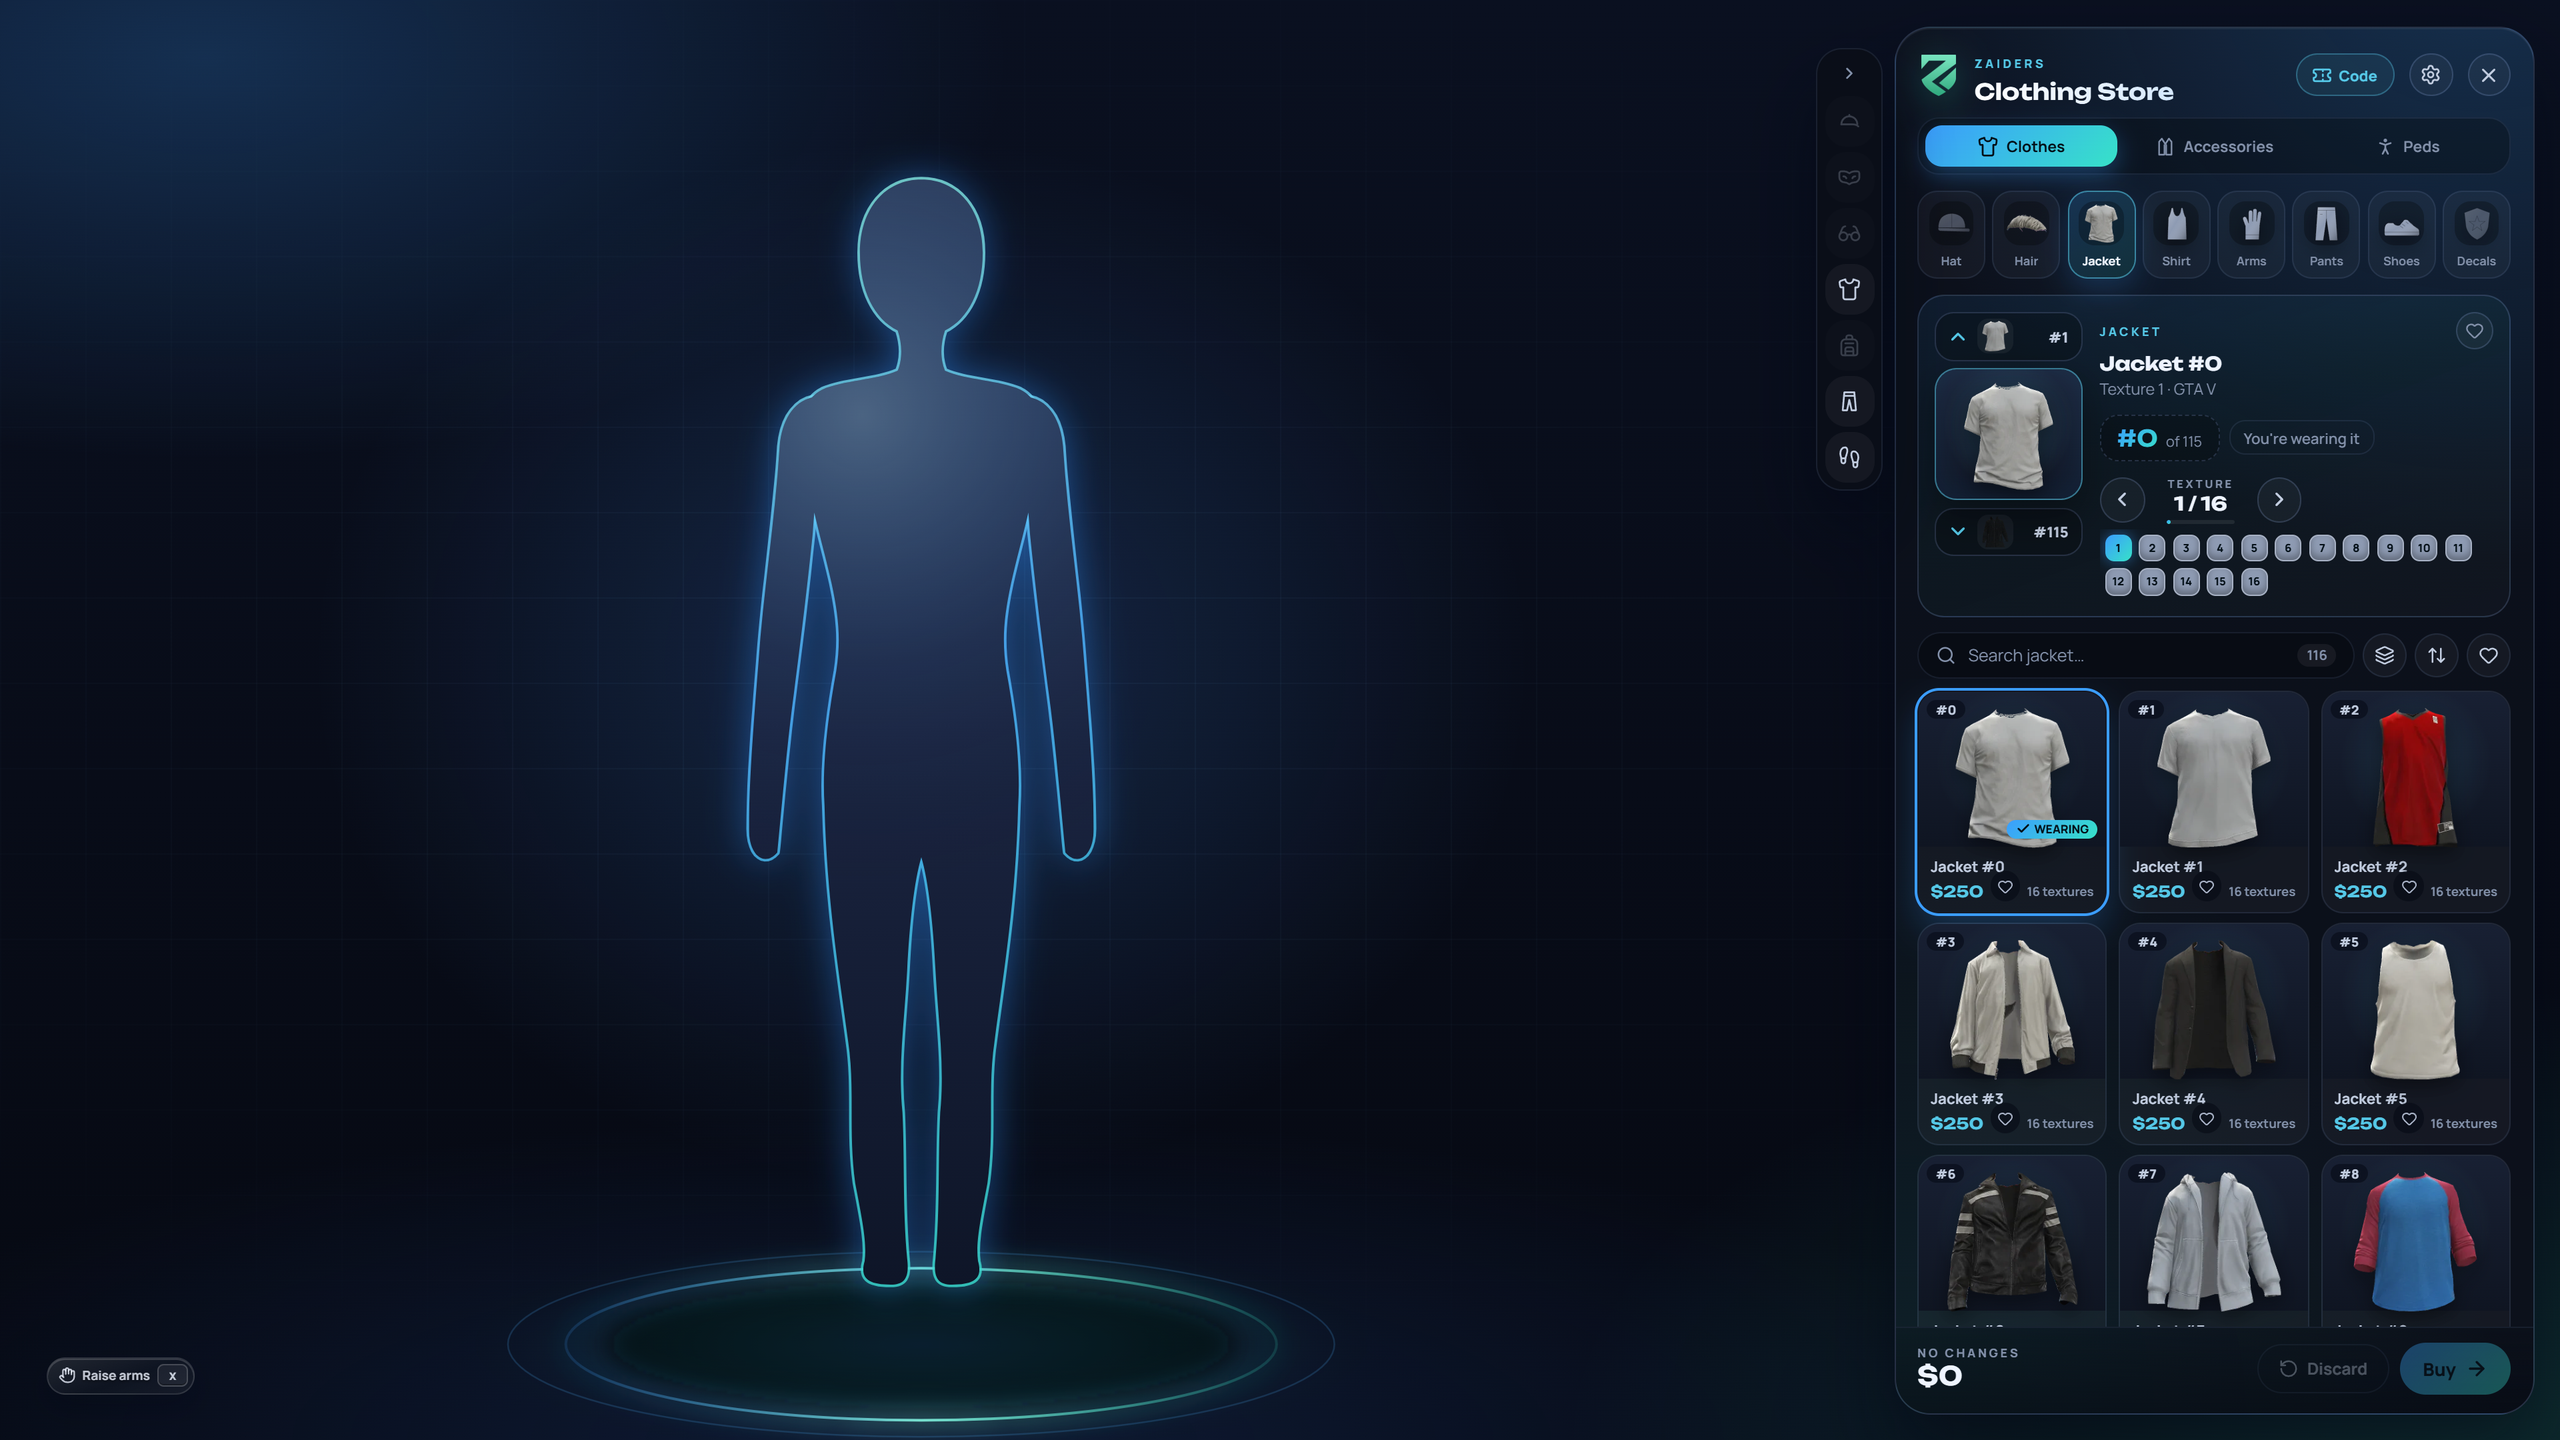
The menu
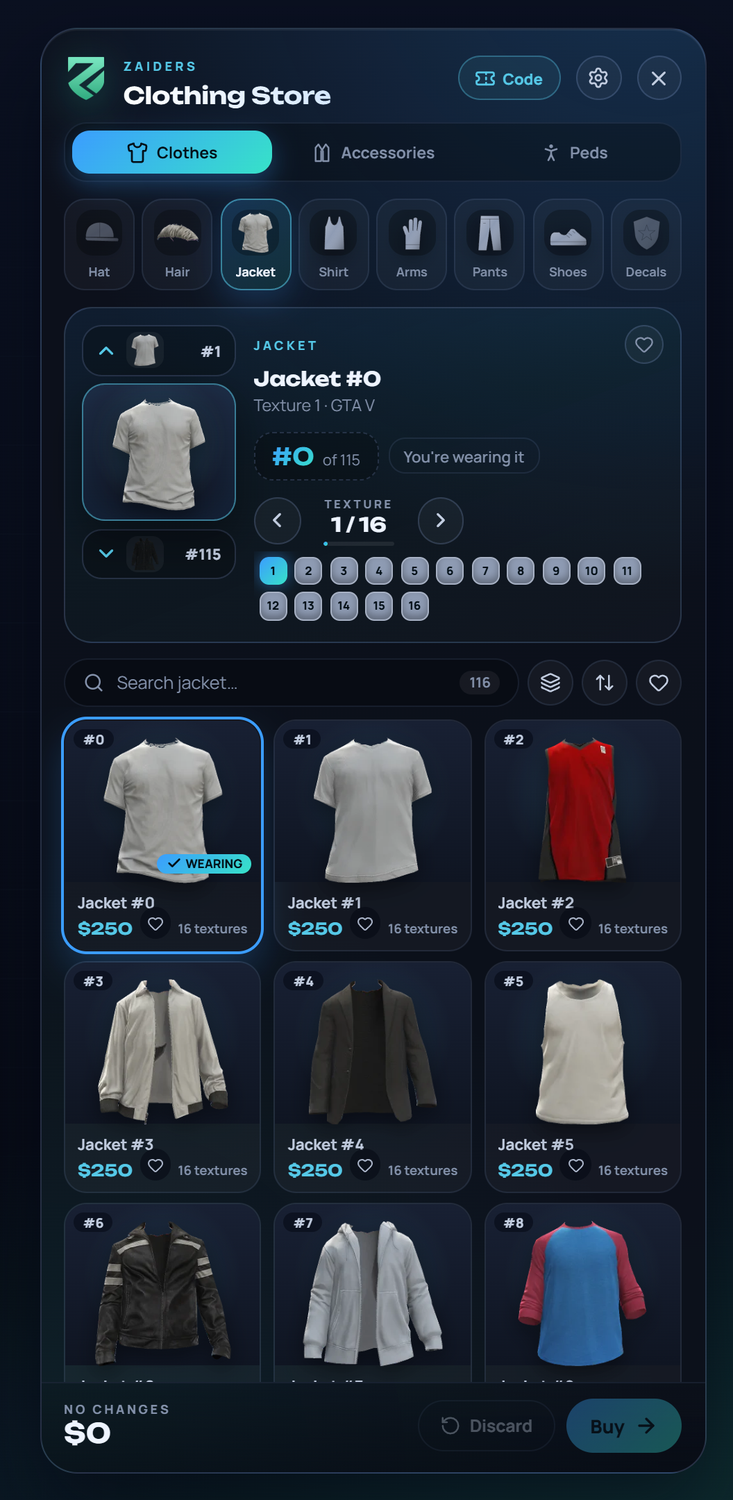
From top to bottom:
- The header. The server's brand and the shop. Code uses an outfit code another player shared (see below). The gear opens Settings, and the cross leaves without buying (Esc).
- The sections. Clothes, Accessories and Peds.
- The slots. Hat, hair, jacket, undershirt, arms and gloves, pants, shoes and decals. Accessories has masks, glasses, earrings, chains, watches, bracelets, vests and bags.
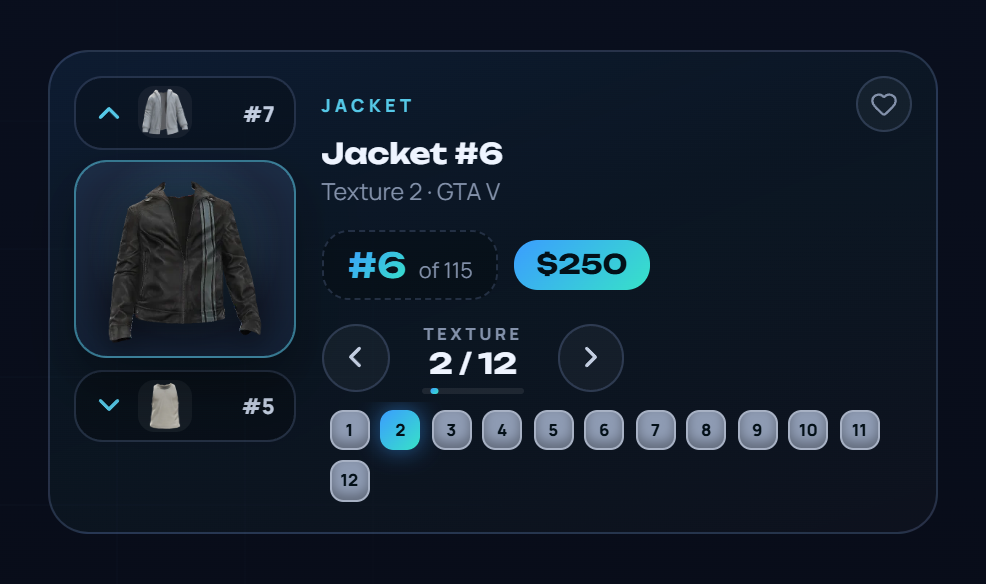
- The garment you're on. Its photo, its number, its textures and its price. Above and below are the previous and next garments.
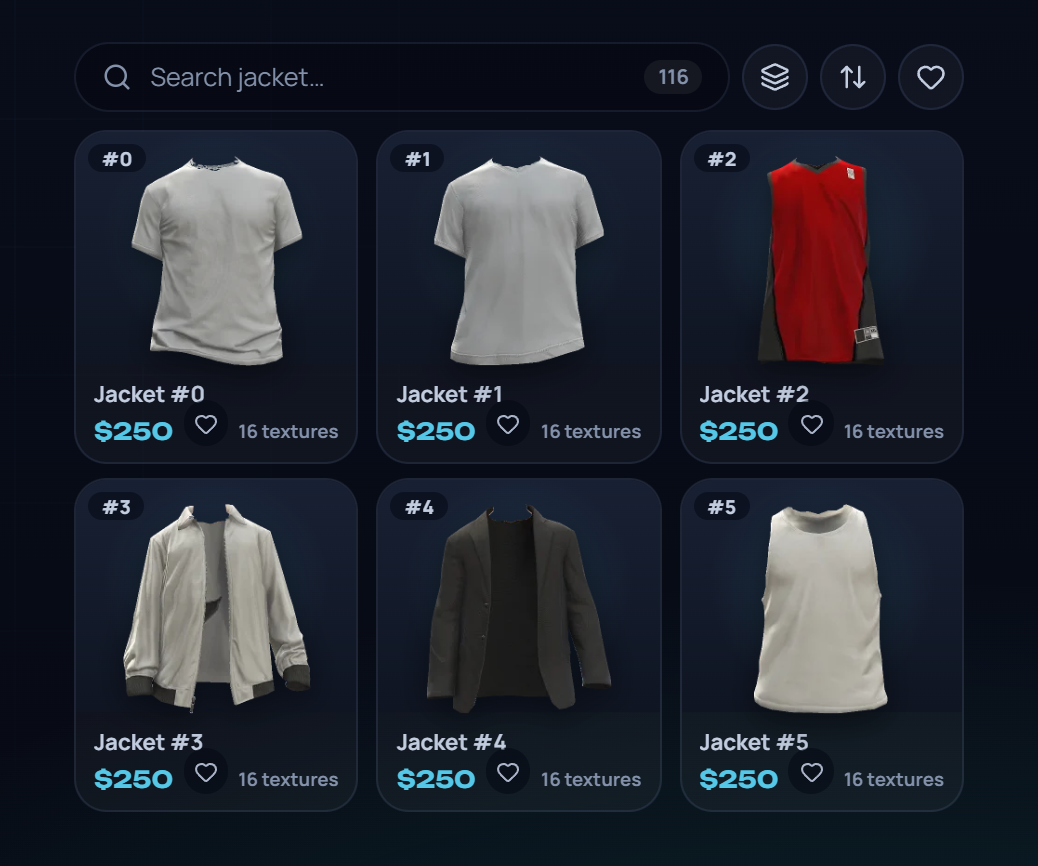
- Search and filters. Search by name or number, filter by pack, sort by number, name or price, or show only your favorites.
- The grid. Every garment of the slot, with its photo, price and how many textures it has. What you're wearing is marked.
- The cart. How many changes, the total, Discard and Buy.
Browsing garments
| Key or click | What it does |
|---|---|
| ↑ / ↓ | Next or previous garment of the slot. |
| ← / → | Next or previous texture of the garment. You can also click a texture's number. |
| A card in the grid | Puts that garment on. |
| The heart | Adds the garment to your favorites. They're kept in your game, per garment. |
| Esc | Closes what's open (a sheet, the search) or leaves without buying. |
Every change goes on the character at once, to try it. Nothing is charged until you pay, and leaving without paying puts back what you had.
Camera, pose and take-off buttons
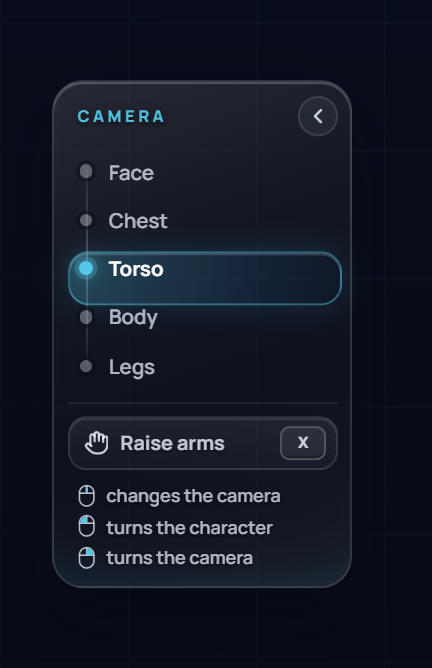
- The mouse wheel over the character moves the camera through five shots: Face, Chest, Torso, Body and Legs. When you pick a garment, the camera goes to it on its own.
- Left click and drag turns the character. Right click and drag turns the camera.
- X or the arms button raises the character's arms, so you can check that a jacket doesn't break. X again lowers them.
- The Camera focus setting shows these shots as a panel on the left, with the arms button inside.
The character stands still while the menu is open, in the same pose every time.
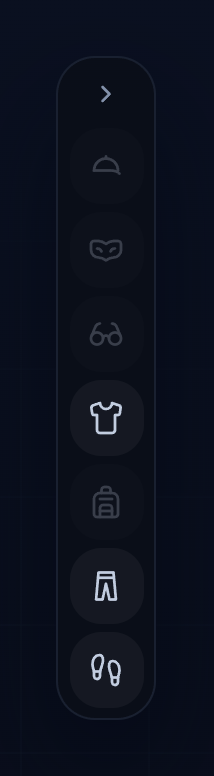
The take-off buttons beside the menu take a garment off with one click: hat, mask, glasses, jacket, pants, bag and shoes. Click again to put it back on. Taking the jacket off also takes off the undershirt, gloves and decals.
What goes on in each slot when undressing is set in Config.Undress and Config.UndressWithTop. See the Config reference.
Settings
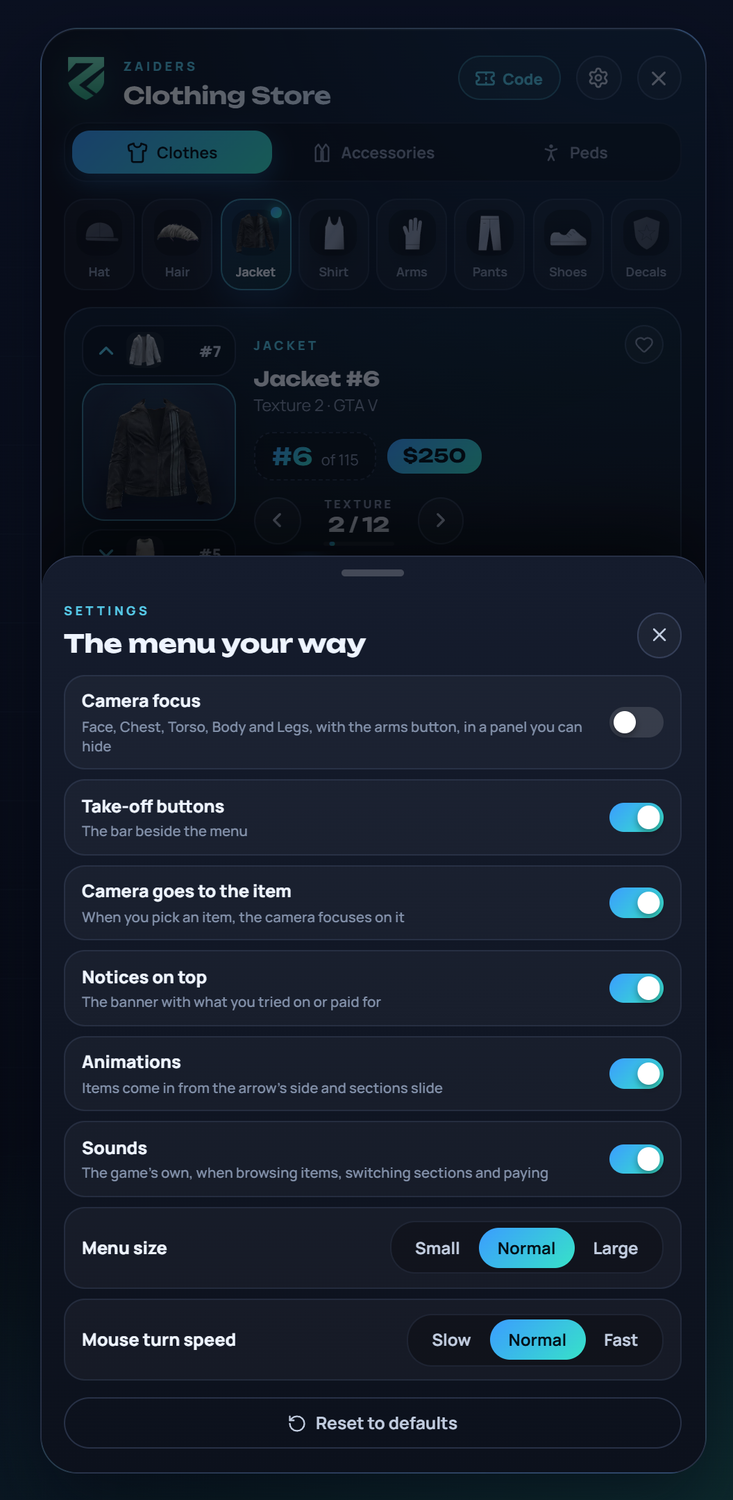
Each player can tune the menu to their taste. It's saved in their game:
- Camera focus: the camera shots and the arms button in a panel on the left.
- Take-off buttons: the bar beside the menu.
- Camera goes to the item: the camera frames each garment you pick.
- Notices on top: the banner with what you tried on or paid for.
- Animations: garments come in from the arrow's side, and sections slide.
- Sounds: the game's sounds when browsing, switching sections and paying.
Config.Sounds = falseturns them off for everyone. - Menu size: small, normal or large.
- Mouse turn speed: slow, normal or fast.
Reset to defaults puts everything back.
Paying
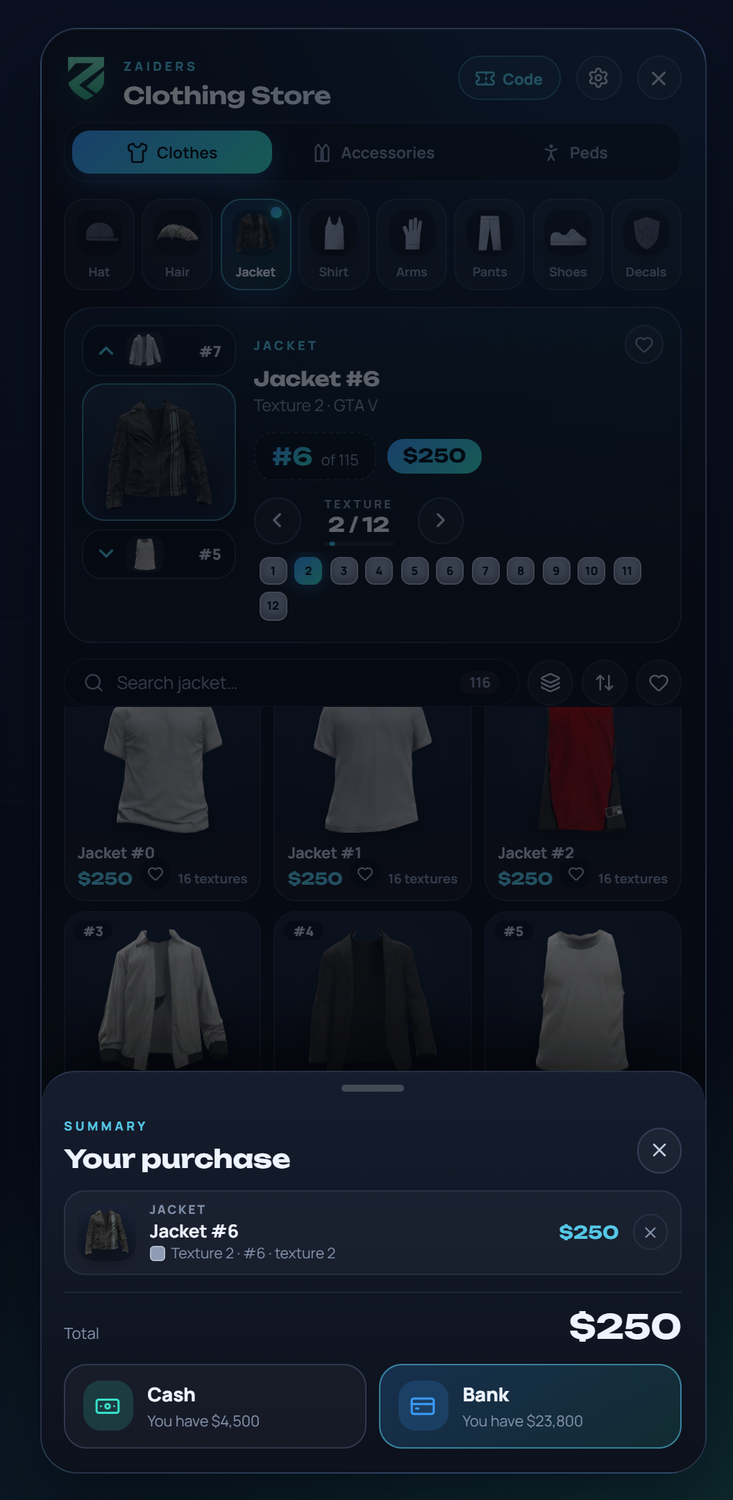
Buy opens the summary: each change with its price, the total, and the player's cash and bank balances. Each line can be undone. Paying charges the framework's money of the chosen account.
- The server prices every purchase with its own prices and checks it against the player's saved look. It never charges more than the menu showed. See What the server checks.
- After paying, the menu closes and the game says how much was charged.
Config.CloseAfterPay = falsekeeps it open. - Discard goes back to how the player was.
- Garments the player was already wearing are free.
Using an outfit code
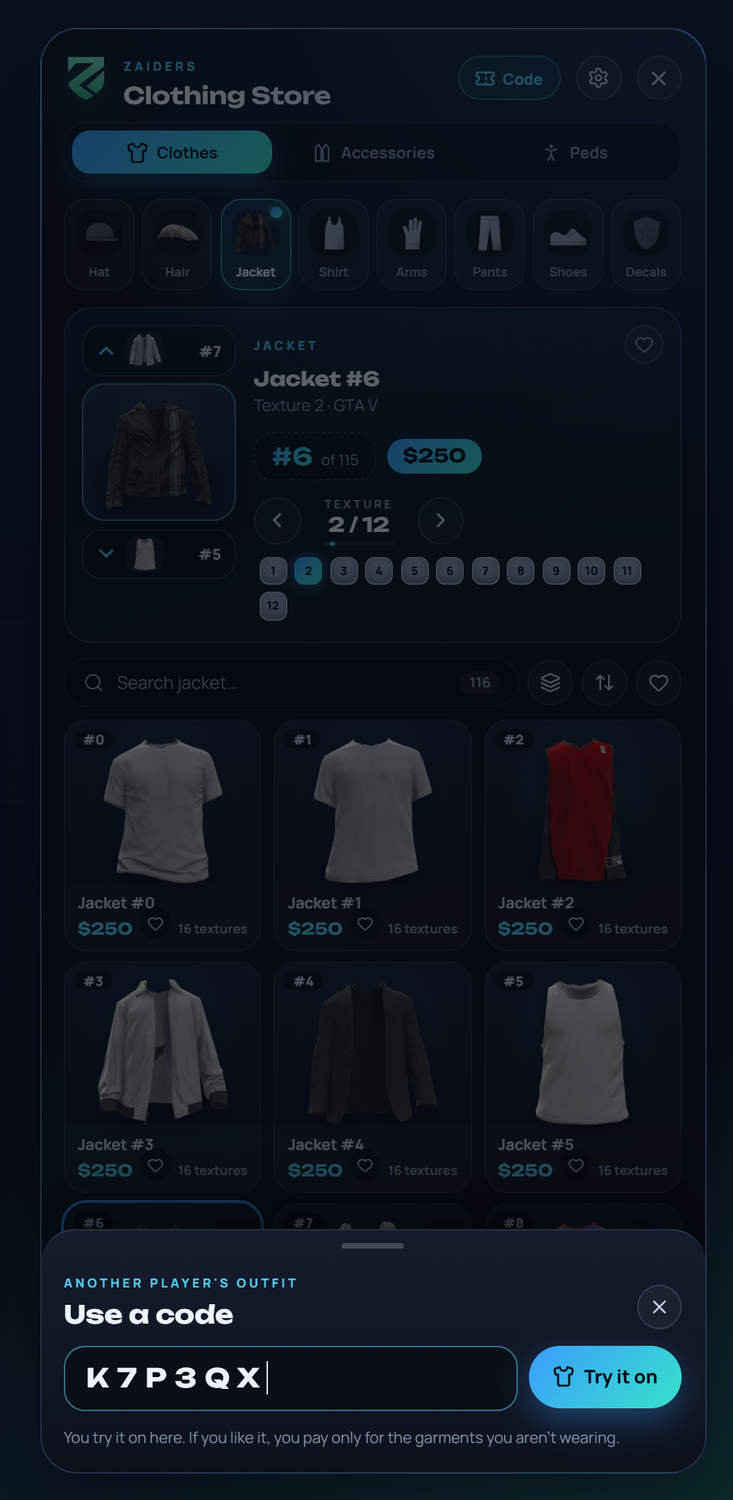
Players can share their outfits with a 6-letter code from the wardrobe. Whoever gets a code taps Code at the top of a clothing store, types it and taps Try it on.
The outfit goes on to try, and only the garments the player isn't wearing go into the cart. Garments that are out of stock, or only for a job or group they're not in, stay as their own. Nothing is given away for free: they pay for what they keep.
Codes last 24 hours (Config.Wardrobe.shareHours). See Wardrobe & outfits.
Accessories and Peds
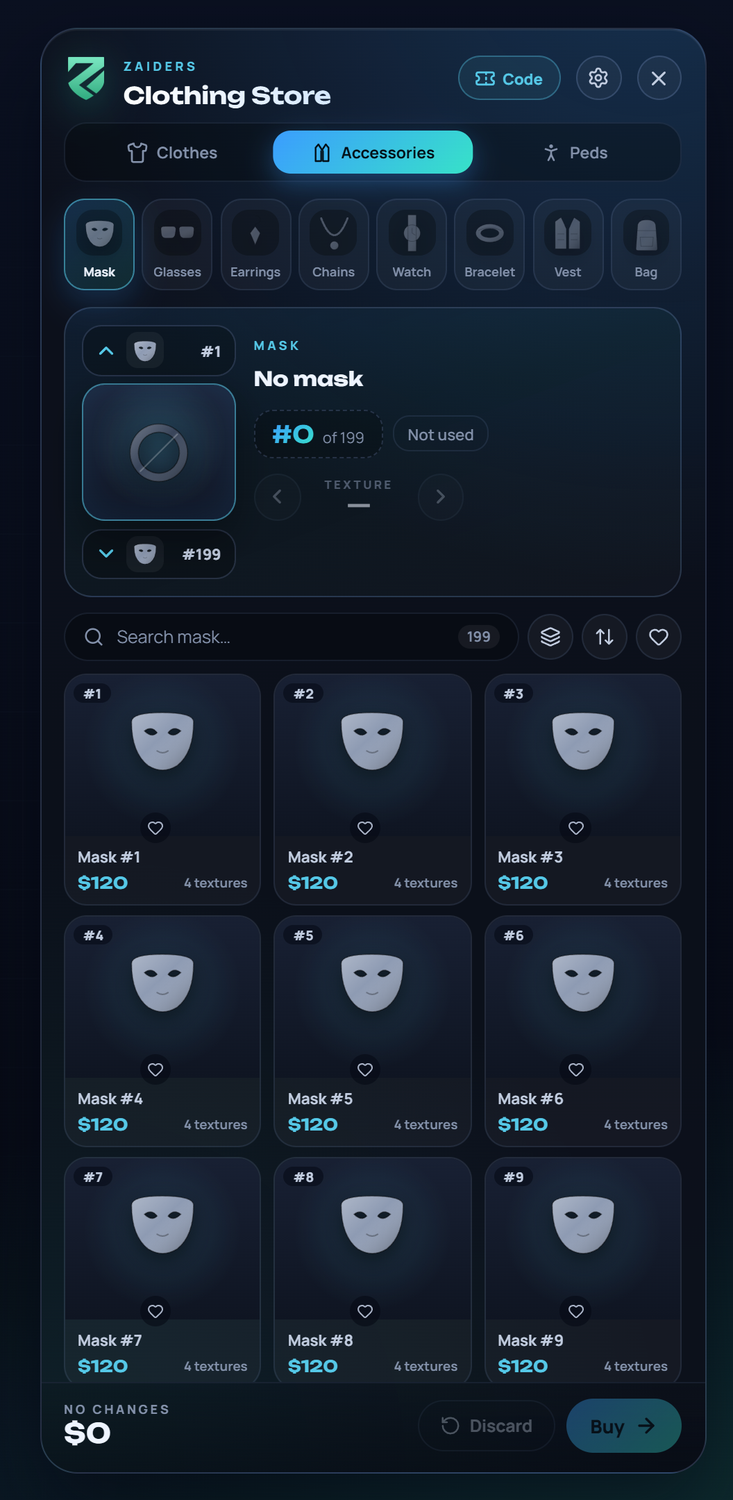
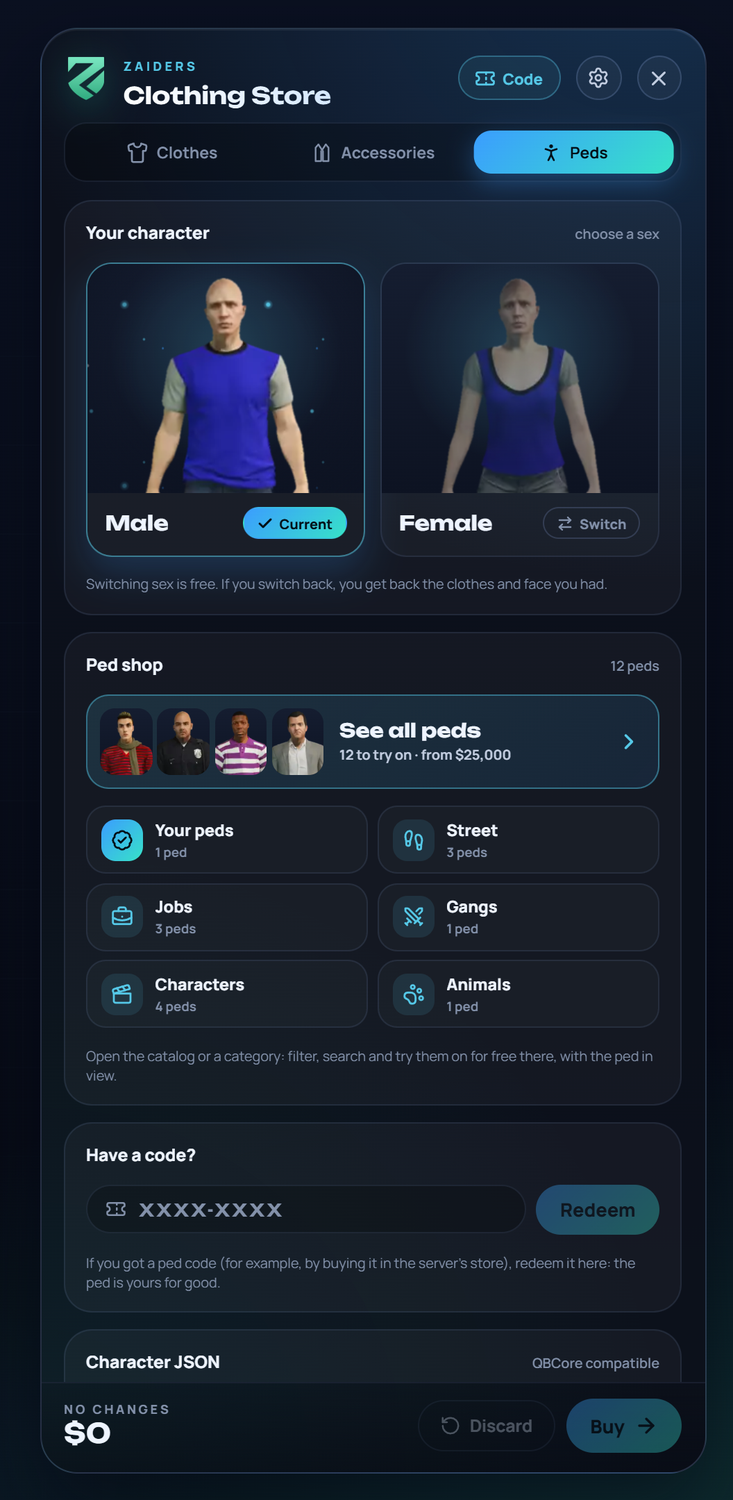
The Character JSON at the bottom of Peds copies the character's look in QBCore's appearance format, to take it to another server. Admins can also paste one there (QBCore, illenium-appearance, fivem-appearance or ESX skinchanger formats). A broken JSON never changes the character.
For admins: editing a garment
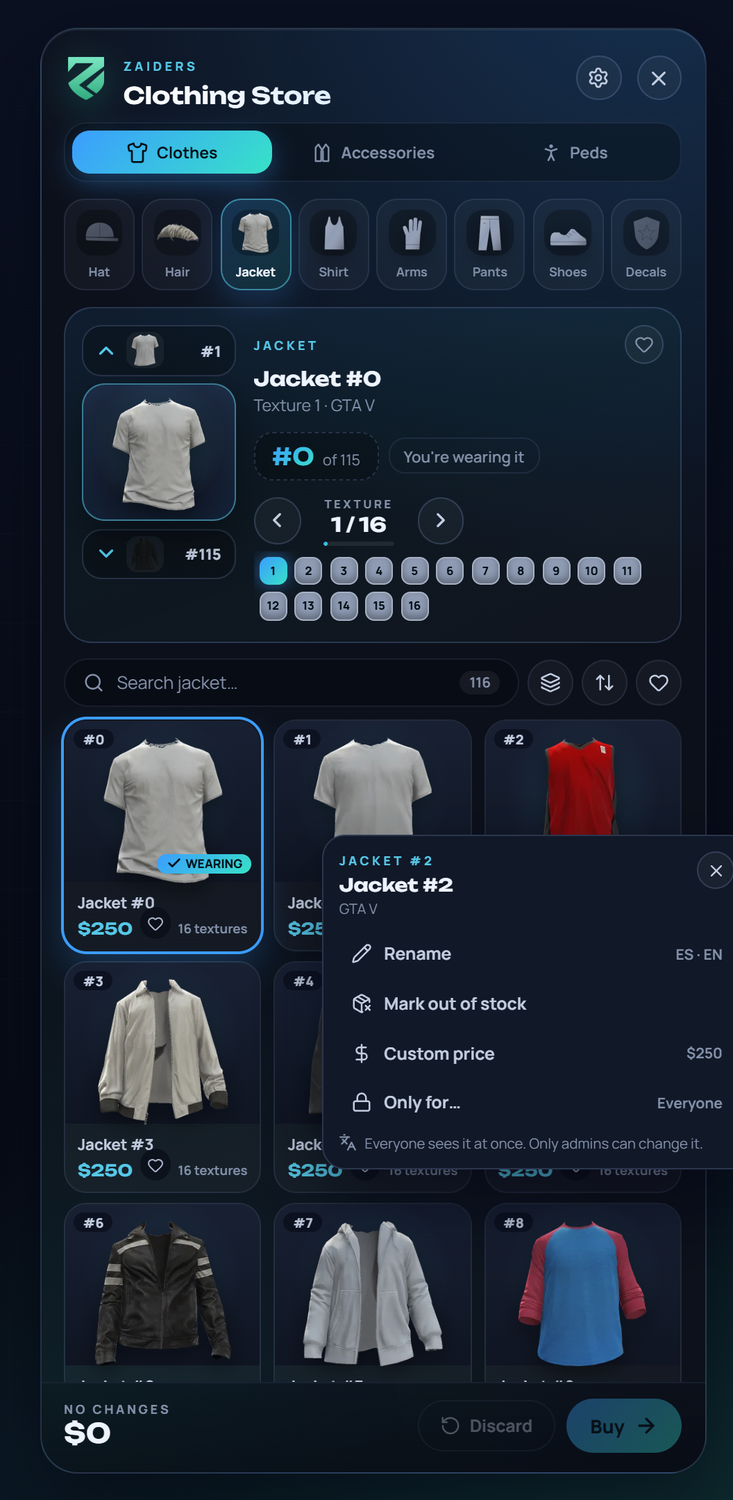
Admins and catalog editors can right click any garment, in the grid or on its card:
- Rename: a name in English and one in Spanish. Use the game's name goes back.
- Mark out of stock / Put back in stock.
- Custom price: a price for this garment only. Use the shop's price goes back.
- Only for…: jobs, gangs (from a grade) or groups by permission, such as VIP.
Everyone sees the change at once. The panel's Catalog editor does the same for many garments at a time.
Out of stock
A garment out of stock isn't sold to anyone, and players don't see it. Admins still see it, marked, so they can put it back in stock. If an admin tries it on, the cart marks it and won't let them pay until it's removed.
Garments only for some players
A garment can be only for some players:
- Jobs or gangs, from a grade on. For example, police uniforms only for the
policejob. - Groups by ACE permission, such as VIP, from
Config.GarmentGroups. See Commands & permissions.
Players outside the group don't see those garments, and the server doesn't sell them, even if another script opens the menu for them.